Undertaking Your Personal Shower Drain Setup
Undertaking Your Personal Shower Drain Setup
Blog Article
We've unearthed the article about Easy Shower Drain Installation Tips directly below on the internet and concluded it made good sense to share it with you here.
Upgrading a bathroom is just one of the extra prominent house improvement projects. Managing the plumbing for draining your shower can be exceptionally easy unless you overdo it.
Managing Your Own Shower Drainpipe Installment Task
Whether you are a bathtub or shower person, the majority of people search for shower just options when buying a residence. This simple reality indicates more than a few homeowners spend a weekend break updating or installing showers in their washrooms. Fortunately for you, it is a relatively easy procedure.
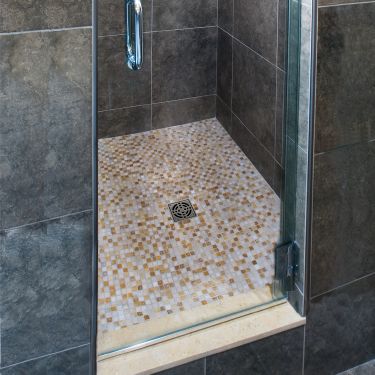
A collector or pan describes the straight surface situated at the bottom of the shower. The collection agency typically consists of a non-slip surface somewhat banked in the direction of the center or any place the drainpipe lies. Incorporated with three to four inch walls around the side, the objective of your shower drain plumbing is to obtain the water to stream to and also down the tubes.
You can literally build a collection agency for your brand-new shower, but you truly require to think about it. Do you truly intend to get into the issues of obtaining the sloping correct, in addition to making certain every facet of it is waterproof? And I imply every element! It is much easier to just purchase a pre-cast collection agency online or at your regional Lowes, House Depot or hardware store. Building one might seem like a fantastic idea, yet you will possibly really feel in a different way after a couple of hours.
No matter exactly how you set about getting a frying pan, you must make every effort to use one that has the drainpipe located in the very same place as the original frying pan. Moving the drainpipe pipes can be a job, especially if the builder made use of an unique framework framework. If you are identified to move the drain, you are going to have to reduce the pipeline or extend it, which might imply ripping up huge chunks of the floor. Rephrase, you are mosting likely to be taking a look at a several weekend job.
Assuming we have our drain aligned, the actual connect is fairly simple. The water drainage pipe need to be dealing with upright up to the collection agency. It will typically look like a "U", which means it functions as a cleanout to maintain nasty smells from returning up from the drainpipe. To connect the drain, you are going to develop a water limited link in between a drainpipe cap on the top of the frying pan as well as the drainage pipeline. Equipments vary, but you are typically mosting likely to do this by putting a combining piece on the top of the drainage pipeline. This is then covered with gaskets and also actually screwed right into the drain cap. The drainpipe cap should work as a locknut, to wit, it screws directly onto the combining.
The tricky part of this procedure is obtaining your drain cap to suit a watertight setting in the frying pan. This is accomplished by backing off the drain cap as soon as you are sure whatever meshes. Then, you placed plumbings putty around the bottom of the cap and afterwards screw it back on. The putty needs to form a tight seal between the cap and the shower pan, which keeps water from trickling under it and right into the mounting under the shower.
Clearly, washroom showers can be found in a variety of designs nowadays. If you buy a collector, they often come with plumbing instructions or the shop can note anything unusual you need to know. It seems complicated, but is generally rather straight forward. Have fun!
How to DIY a Shower Drain Repair or Replacement
Verify the Source of the Leak
Pour some water down the drain using a funnel. If you don’t see signs of leakage from the drain, the leak may be coming from a worn bathtub seal. In this case, fill the bathtub with water and look for leakage between the bottom of the tub and the floor.
Determine What Drain You Need
There are two main types of drains. The options include those with a trip lever, including foot lock, roller ball, and lift and turn drains. Those with trip levers include pop-up and plunger drains. While each may have its own installation guidelines provided by the manufacturer, we’ll continue with the general process of replacing your shower drain.
Access the Drain
If there’s a cover over the drain flange, remove it. Old covers may be stuck in place, so you may need a hacksaw blade to cut it and pry it loose. But if there is no access panel, locate where the shower pipes are, place a cloth or metal plan below where you cut into the wall (to catch any water), and use a drywall saw to cut a panel on your own (you should wear safety glasses if proceeding with this step). You’ll want to cut a piece that can be put back in the same spot after the drain is replaced.
Ideally, you’ll have access to the drain parts through the shower wall. In some cases, the only option is to make an access point through a closet or bedroom.
Remove the Leaky Parts
With the drain exposed, you should see where it is leaking from. There is usually some discoloration in the area of the leak. The drain body, strainer body, or gasket can be removed with pliers while a screwdriver is needed to remove the strainer.
Repair or Replace the Drain
A shower drain repair kit can be purchased at a home improvement store. It will have instructions that will show you how to disassemble and repair the shower drain. Usually, it’s only necessary to fix the parts that are broken. You can combine old and new parts if they fit together. If the entire drain needs to be replaced, swap out all the old parts for the new ones so there are no more leaks.
Test the New/Repaired Drain
Turn on the water lightly while observing how it flows into the drain. Then check the pipes below the shower (in the basement or on a lower floor) to see if there’s any leakage. Once you verify any leak has been fixed, you can go ahead and patch up the wall (using drywall mud and a mud knife).
Ceilings that have water stains should be repaired. Cut away the affected section and replace with a piece of drywall and drywall mud. This eliminates damage caused by the leak and lets you find and mitigate other potential issues such as mold.
https://www.blackhillsinc.com/blog/how-to-diy-shower-drain-repair-replacement/
Do you appreciate more info about How to Install a Shower Drain? Make feedback down below. We will be interested to find out your opinion about this write-up. Hoping that you visit us again before long. If you liked our article please do not forget to pass it around. Thank-you for taking the time to read it.
Report this page